My fourth and last case study in Dutch academy football concentrates on formations. More specifically, I’ve looked at two formations used in the U18’s of several clubs. This analysis focuses on the theory of what’s good and what’s not so good about the 4-3-3 formations and the 4-2-3-1 formations. In part I: 4-3-3
These two formations have been used the most by the teams in the U18 leagues I’ve observed and in this analysis I will focus on a few things:
- The defensive role of the midfield: double or single pivot
- The attacking role of the midfield: the number ’10’
- Pressing from the front
Often formation is used by media and fans as something that is static, as if each players holds a specific position – but as you may have seen or know, they are rather fluid and change within the game. But the roles asigned to players in a system, that’s what’s important in a game.
In this analysis I will focus on what I’ve observed in the games I’ve seen in the U18 league. This might be different to what senior sides do and the decisions made in attack, defence and transition can therefore be different than what is best, but this analysis looks at what happened.
The 4-3-3

When one of the teams played a 4-3-3 in the U18 leagues, it was constructed as in the image above. A back four with one defensive midfielder (#6) and two midfielders higher up the pitch. Usually this was one central midfielder and one attacking midfielder. On top there was an attacking trio of one striker and two wingers, who usually made runs down the line and delivered crosses to the striker and the attacking midfielder moving up the pitch.
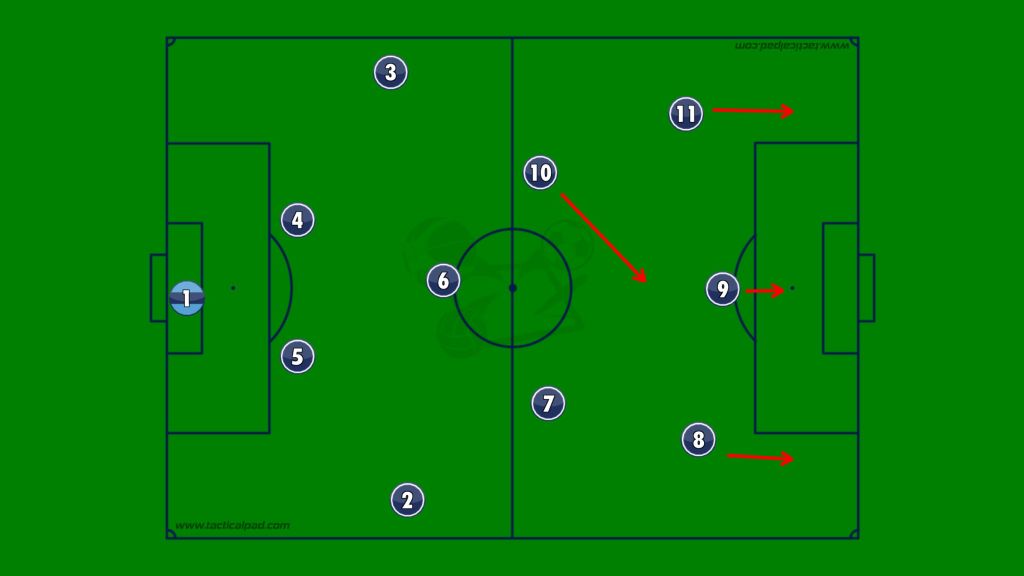
With the 4-3-3 formation you make use of the wings from your wing-attackers as you can see in the image below. The wingers move into the white positions on the wing and are tasked initially with providing crosses into the box, where the number 9 is moving towards.
But that is not their only task. They are trained and have been instructed to look for the attacking midfielder(s) entering the zone just behind the box, also know as zone 14. This is a position from where a lot of goalscoring threat is created via through passes or shots.
In this case the number 10 is very active and committed to be involved in the attacking play of the side with the possession of the ball and the number 7 is a bit more conservative in the case possession is lost and the transition from attack to defence happens.
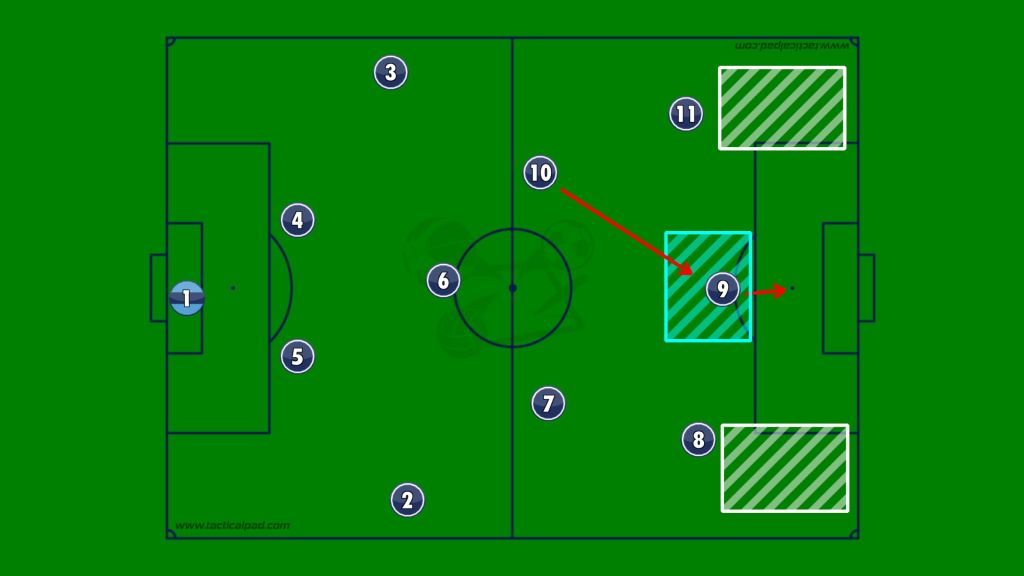
Now attacking via the flanks can be a great threat to the opponent’s goal, but can give disadvantages as well. When the wingers are very well defended, it can leave the striker to be isolated and he has no support. The number 10 in this case won’t make the run forward, but makes himself available to receive a pass.
The wingers also need to be very aware of their defensive positioning: blocking pass lanes and trailing back. If they don’t do that, the opponent’s full backs have a lot of space to progress into the middle third of the pitch.
Illustrated in the image above is how the attacking midfield acted in a scenario when the ball was with the team analysed. In this 4-3-3 there was one defensive midfielder or a single pivot, who was tasked with the defensive duties and acted as the defensive unit with the four-man defence.
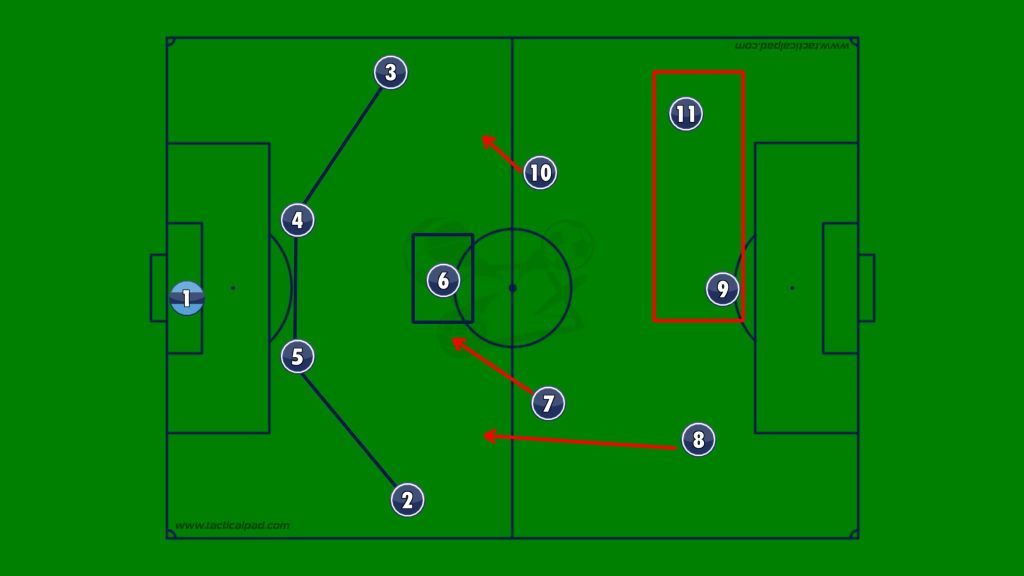
The 4-3-3 does well with the ball because of their presence in the central zones of the pitch and can translate that into dominance. But also in in defence, this formation provides an advantage with 3 midfielders, they defend the central zones of the pitch well and its difficult for the opponents to progress in the middle. And, when the opponent wants to progress via the flanks, they can usually only use one flank – as the other one can be pinned by one of the midfielders.
Talking about defence, a 4-3-3 in defence usually switched to a 4-4-2 in these games observed. This also can be seen in the image above. This makes the defensive block stronger, but in transition from attack to defence there is a big risk: when they play with one defensive midfielder, that player has to be disciplined in his positioning – when he is pulled away from his position, it opens space in the middle and that can lead to dangerous situations in the defensive third.
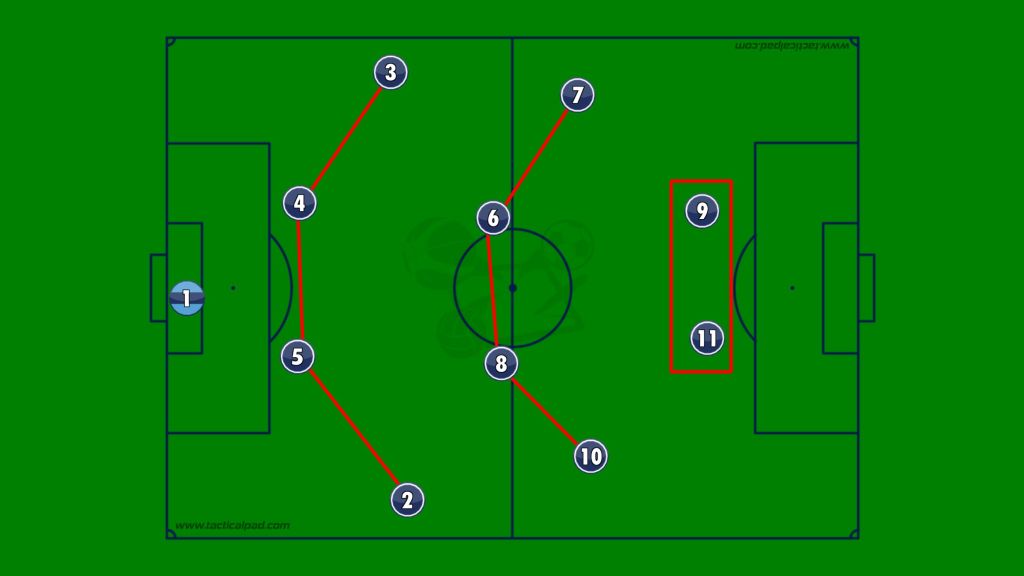
The 4-3-3 changes into a 4-4-2 in defence and what I’ve seen is that the two strikers in this formation (one striker and one winger) press the defence together. The four-man midfield rarely presses before the middle third and when they do, they do it as a unit.
It was a very interesting to see how a 4-3-3 moved and changed within different phases of the game. The U18’s are very close to what senior sides decide on the pitch, but the order of things is not always correct.
*The tactical images are made with Tactical Pad, which gave me the freedom to alter the pitch just like I wanted to.

